Categories
Cleaning-Services

Best Ways to Remove Dust From Furniture

Dust is more than an unattractive layer on tables and shelves. It can contain fabric fibres, soil, pollen, skin cells, pet dander, and other tiny particles. When furniture is cleaned incorrectly, dust may simply move into the air before settling on another surface.

Effective dust removal depends on using the correct tools, following a sensible order, and cleaning areas that are often overlooked. Regular attention can protect furniture finishes while improving the appearance and comfort of a room.

Homeowners exploring practical furniture-care guidance should begin by identifying the material they are cleaning. Wood, glass, leather, painted surfaces, and upholstered furniture may require different products and techniques.

Use a Damp Microfiber Cloth

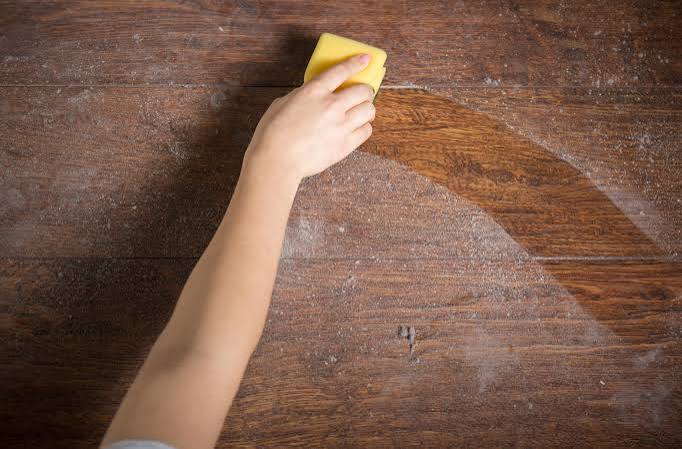
A dry cloth often pushes dust around or releases it into the air. A lightly damp microfiber cloth captures particles more effectively.

The cloth should be damp rather than wet. Excess water can damage wood, leave marks, or enter gaps in furniture. Wring the cloth thoroughly before use.

Fold the cloth into sections and use one clean section at a time. When one side becomes dusty, refold it rather than wiping the dirt back onto the surface.

Rinse washable microfiber cloths after cleaning. Avoid using fabric softener because it can coat the fibres and reduce their ability to capture dust.

Clean Rooms From Top to Bottom

Dust falls as you clean, so begin with the highest surfaces. Start with the tops of wardrobes, tall shelves, cabinets, picture frames, and headboards.

Move downward to tables, desks, chairs, and lower shelving. Finish by vacuuming or mopping the floor.

This order prevents freshly cleaned furniture from being covered by particles removed from higher areas. It also reduces repeated work.

Those interested in efficient home-cleaning methods should also work around the room in one direction. Moving clockwise or anticlockwise helps prevent missed surfaces.

Remove Objects Before Dusting

Cleaning around decorations, books, lamps, and electronics leaves rings of dust around their bases. Remove objects from the surface whenever possible.

Dust the furniture first, and then wipe each object before returning it. Check the underside of decorative items, since dust often collects where it cannot be seen.

Use this opportunity to reduce unnecessary clutter. Fewer objects on open surfaces can make future cleaning faster.

Handle fragile objects carefully and place them in a secure location while cleaning. Avoid stacking breakable items on unstable chairs or tables.

Vacuum Upholstered Furniture

A cloth cannot remove dust embedded in fabric. Use a vacuum cleaner with an upholstery attachment to clean sofas, armchairs, fabric headboards, and padded dining chairs.

Remove loose cushions and vacuum both sides. Clean the spaces beneath the cushions, where crumbs, hair, and dust often collect.

Use the crevice attachment along seams and edges. Lower the suction setting when cleaning delicate fabric.

Check the furniture label before using moisture or stain treatments. Dust should normally be removed before any wet-cleaning method is attempted.

Protect Wooden Furniture

Wooden furniture can be damaged by excessive water, harsh chemicals, and rough cleaning pads. Use a soft cloth and a product approved for the particular finish.

Dust in the direction of the wood grain when possible. This helps remove particles from small lines and creates a more even appearance.

Do not spray cleaner directly onto the furniture unless the product instructions specifically recommend it. Apply a small amount to the cloth to reduce the risk of overspray, staining, or liquid entering joints.

Trusted home cleaning and furniture advice should always distinguish between cleaning and polishing. Furniture polish can improve shine, but it is not always needed and may create buildup when used too frequently.

Clean Glass Without Leaving Residue

Glass tables, cabinet doors, and shelves show dust quickly. Begin by removing loose particles with a clean microfiber cloth.

Apply a small amount of glass cleaner to the cloth rather than spraying heavily across the surface. Wipe using steady overlapping movements.

Use a separate dry cloth to buff away remaining streaks. Check the glass from different angles because marks may be visible only when light reflects across the surface.

Remember to clean the edges and underside of glass tables when they can be reached safely.

Dust Carved and Detailed Furniture

Furniture with carved patterns, grooves, vents, or decorative moulding can trap dust in narrow spaces. A flat cloth may not reach these areas.

Use a soft cleaning brush, clean paintbrush, or vacuum attachment to loosen dust. Work gently so delicate details are not scratched or broken.

Cotton swabs may help with small corners, though they should not be pushed into electrical equipment or tight mechanical spaces.

After loosening the dust, vacuum the surrounding area so the particles do not settle elsewhere.

Clean Behind and Under Furniture

Dust gathers behind beds, sofas, cabinets, and television stands. These areas may be ignored because they are difficult to access.

Move lightweight furniture carefully and vacuum beneath it. Use an extendable duster or a slim vacuum attachment when furniture cannot be moved.

Ask for assistance before moving heavy items. Dragging furniture can damage flooring, strain muscles, or cause the object to tip.

Check cables before moving desks or television units. Disconnect equipment safely when access is required.

Reduce How Quickly Dust Returns

Dust cannot be eliminated permanently, but its accumulation can be slowed. Use entrance mats and remove outdoor shoes to reduce the amount of soil brought indoors.

Wash bedding regularly because fabrics release fibres and collect skin particles. Vacuum rugs, carpets, curtains, and upholstered furniture according to their care requirements.

Replace or clean heating, ventilation, and air-conditioning filters according to the manufacturer’s schedule. Dirty filters may reduce system efficiency and contribute to airborne particles.

Keep windows closed when outdoor pollen or construction dust is unusually high. At other times, sensible ventilation may help refresh indoor air.

Avoid Common Dusting Mistakes

Do not use the same dirty cloth throughout the entire house. Once a cloth becomes heavily soiled, it may spread grime rather than collect it.

Avoid feather dusters that scatter particles unless the tool is specifically designed to trap dust. Do not apply excessive polish, oil, or water to furniture.

Never use a household cleaner on an unfamiliar finish without testing it. Choose a hidden area and check for discoloration, swelling, or changes in texture.

Readers following helpful household management updates should create a realistic dusting schedule. Frequently used rooms may need weekly attention, while less-used furniture can often be cleaned less often.

Removing dust properly is not complicated. Use clean tools, begin at the top of the room, match the method to the furniture material, and finish by cleaning the floor. These habits capture dust instead of redistributing it, helping furniture remain attractive and easier to maintain.

Categories
Cleaning-Services

Transform Your Home with Sparkling Clean Windows: A Residential Window Cleaning Overview

People often forget to take care of their windows when they want to make their home look nice and work well. If you clean your windows, your house will look better from the street and feel warmer and nicer because more natural light will come in. If you want to sell your house or just make it smell better, having somebody clean your windows can make a big difference. Let’s talk about how clean windows can make your home look better and why it’s a good idea to hire a professional window-cleaning service.

The Aesthetic Impact of Clean Windows

First impressions matter, and the condition of your windows plays a major role in shaping how others view your home. Dirty, streaked windows can make your home look neglected and dull, even if the rest of the exterior is well-maintained. Clean windows, on the other hand, can brighten up your home, making it feel more welcoming and well-cared-for. Not only do sparkling windows boost your home’s curb appeal, but they also enhance your interior’s natural lighting. The clearer the glass, the more sunlight can pour into your living spaces, lifting the mood and making rooms feel more spacious.

Once your windows are clean, they will also show off your views, whether they are of a yard, mountains, or cityscape. When there are no more smudges, lines, or dirt in the way, your view is clear, giving you the best view of the outside from inside your home.

Improved Energy Efficiency

Cleaning your windows does more for your home than just make it look better. Did you know that dirty windows can make your home use more energy? It’s possible for less sunlight to get into your home when grime and dirt stick to your windows. This means you may use artificial lighting more during the day, which will make your electricity bill go up.

Additionally, dirt and other particles on windows can make seals and frames less effective, which could result in air leaks. Because your HVAC system may have to work harder to keep the temperature where you want it, these leaks can make your heating and cooling costs go up. Regular window cleaning will not only make them look great, but also make sure they work as well as they can.

Extending the Lifespan of Your Windows

Over time, dirt, grime, and contaminants like hard water stains or salt can wear down your windows. If left uncleaned, these elements can cause permanent damage to your glass and window frames. For example, hard water stains can etch the surface of the glass, making it impossible to remove stains completely.

By scheduling regular professional window cleanings, you protect the longevity of your windows. The trained professionals who clean your windows know exactly how to remove tough stains without causing damage to the glass. They use the right tools, cleaning agents, and techniques to ensure that your windows stay in excellent condition for years to come.

The Benefits of Hiring Professionals for Window Cleaning

It might seem easy to clean your own windows, but there are many good reasons to hire a professional. If you don’t have the right tools and training, cleaning windows can be dangerous, especially on homes with more than one floor. Professional window washers know how to safely clean windows in places that are hard to get to, like on high floors or windows that are at odd angles.

Also, pros can clean better than you could on your own, missing spots that you might miss. They know how to get rid of the grime, stains, and paint that builds up over time, leaving your windows clean. For example, window edges, frames, and tracks are often cleaned by professionals, but many people forget to do this when they clean their own homes. 

Why Choose Spotless Windows?

Visit https://www.spotlesswindows.com/residential-window-cleaning/scottsdale/ for the best window-cleaning service for homes in Scottsdale, Arizona. They’ll make your house look great. They make sure that every window is clean and safe by using modern tools and eco-friendly products by their skilled cleaners. There will be more natural light and clear views when Spotless Windows takes care of your windows. You will also feel at ease.

You can hire a professional window cleaner for a deep clean once or on a regular basis. It’s an investment that pays off in the long run. Not only will clean windows make your home look better, but they will also make it more comfortable, save you money on energy costs, and increase its value. Now is the time to get your windows professionally cleaned and see the difference it can make in your home.

Categories
Cleaning-Services

When To Use A Concrete Stain Remover?

The concrete stain remover is a potent cleaning solution intended to remove tough stains and discolorations from concrete surfaces. It works by breaking down the stain’s chemical bonds. Even though concrete is a strong and long-lasting material, it can become discolored over time as a result of a wide range of factors, such as prolonged contact with corrosion, oil, grease, and other substances. If you’re pondering when it’s appropriate to use a concrete stain remover, the following are a few instances in which doing so could prove to be beneficial.

Removing Oil And Grease Stains

The removal of oil and grease stains from concrete surfaces, such as driveways, garage floors, and parking lots, is one of the most frequent reasons for using a stain remover designed specifically for concrete. Stains caused by oil and grease can be difficult to remove using conventional cleaning methods; however, a concrete stain remover of high quality can penetrate deep into the concrete to lift and remove these tenacious stains.

Eliminating Rust Stains

Rust streaks on concrete surfaces are another common problem that can be difficult to fix. They can be brought on by a wide variety of factors, such as the use of metal in automotive components, garden tools, or outdoor patio furnishings. Rust stains can be effectively removed from concrete with the use of a concrete stain remover, which works by dissolving the rust fragments and removing them from the surface of the concrete.

Cleaning Up After Construction Projects

If you have recently finished a construction project that involved concrete, your concrete surfaces may have been left with streaks and discolorations after the project was finished. To clear up these areas and restore the appearance of your concrete, you can use a stain remover designed specifically for concrete.

Preparing Surfaces For Painting Or Staining

If you intend to paint or stain the concrete surfaces in your home, it is essential to properly prepare those surfaces to ensure that the paint or stain will attach correctly. This involves removing any stains or discolorations that could affect the appearance of the final product by using a concrete stain remover.

Restoring The Appearance Of Older Concrete Surfaces

Concrete surfaces that are exposed to the elements and that experience typical wear and tear can, with time, become stained and discolored. These surfaces can have their original look restored by using a concrete stain cleaner, which will also give them a more modern and tidy appearance.

Removing Graffiti And Other Markings

If your concrete surfaces have been defaced with graffiti or other markings, a concrete stain remover may be an effective solution for eliminating these unsightly blemishes. If your concrete surfaces have been defaced with graffiti or other markings, click here. The pigments can be broken down and removed from the surface of the concrete by using a stain cleaner, which works by penetrating deep into the concrete.

Conclusion

A concrete stain remover can be a useful instrument for restoring and maintaining the appearance of your concrete surfaces in a variety of settings, including those in which stains have already been introduced. It doesn’t matter if you’re dealing with rust stains, oil, and grease stains, or any other kind of discoloration; a stain remover of high quality can help you get the work done quickly and efficiently no matter what kind of discoloration you’re dealing with. You can maintain the appearance of your concrete surfaces in pristine condition for many years to come if you use a stain remover designed specifically for concrete.

Categories
Cleaning-Services

How To Clean Driveways Of Oil Stains?

Oil leaks and stains are commonplace on driveways and parking lots. They may look unpleasant, especially if they take up a lot of room. Finding a method to clean up the spills is essential because you cannot stop them from occurring (a leak from another car could be the source).

One thing to keep in mind, however, is that this specific type of stain is one of the most challenging to remove. In addition to the fact that specific cleaning supplies are required, oil stains have a tendency to rapidly sink into certain types of driveways, which makes the problem even worse.

You must conduct a thorough analysis of the situation to be successful while cleaning up oil spills on a driveway. You typically have two choices: doing it yourself or hiring a professional. By deciding to do it yourself, you avoid paying an expert’s fees. But you might not get the desired effects, particularly if the spill is too big and the cleaning agents are homemade and insufficiently potent. In addition, you run the risk of harming the driveway or potentially making the stain worse. In addition to discoloring the surface, some cleansers can be more problematic than the spill itself.

There are several advantages to having oil spills on the driveway professionally cleaned. Environmentally friendly chemicals are probably used by the cleaning firm. Given that they are professionals in the industry, their solutions for oil stain removal on concrete are certain to be successful on stubborn greasy stains as well. Pressure washers are also used by professional cleaning agencies, so you can be confident that the unattractive stain will be completely removed.

How To Remove Oil From A Concrete Driveway

Some oil spills might not be large enough to require professional cleaning. If that’s the case, then follow these simple instructions to get rid of them.

  • Make sure the entire area is free of any obstructions and trash.
  • Before starting any work to clean up oil spills on the driveway, put on safety clothing.
  • Halt the further spread of the spill. To do this, wipe the oil using paper towels or pieces of fabric then, use an absorbent substance to cover the residual stain. You can use dry, fine materials like sand or sawdust, or clay kitty litter.
  • Once the fine material has absorbed all of the leftover oil, brush it off.
  • To treat the oil stain, locate an oil-removing substance. Any high-foaming detergent, washing powder, or degreaser can be used. It is recommended that you try any cleaning chemical on a hidden area of the driveway first to ensure that it won’t discolor it.
  • Apply the cleaning solution to the driveway’s troublesome area.
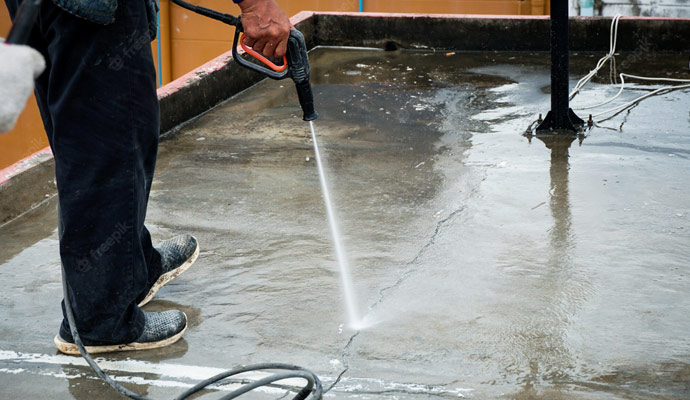
  • If at all possible, use a power washer to remove the stain; then, thoroughly rinse the area with water.

This eliminates the potentially discolored water that was previously present on the surface. After some time has passed, carry out the process once more until none of the oil remains. To achieve the best possible results, oil spills on a driveway should ideally be cleaned up as soon as they occur.

As soon as you become aware of one, you should immediately take action to get rid of it, either by yourself or with the assistance of a cleaning agency. It is recommended that you only clean up little oil spills on your own and that you need a professional’s assistance if the stains are widespread or cover a substantial area. The best course of action is to just clean up minor oil spills on your own.

Categories
Cleaning-Services

Is it possible to vacuum broken glass? Here’s How to Deal With It

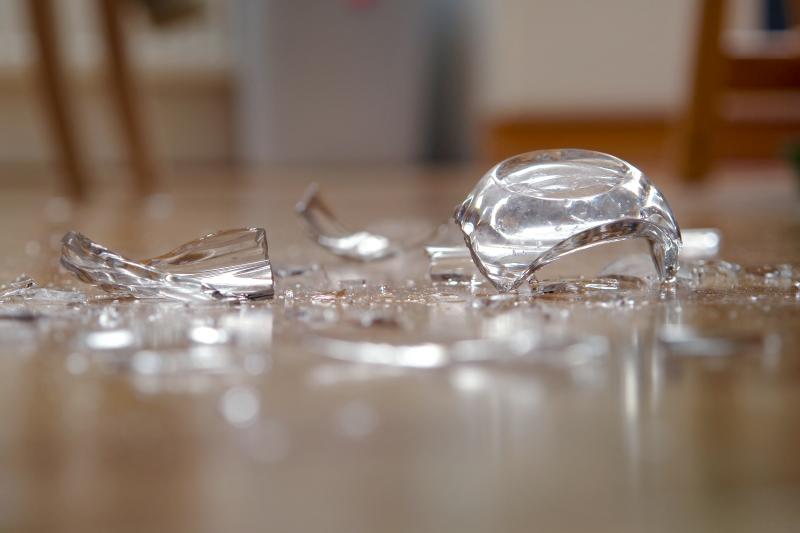
How can a single smashed glass tumbler or lightbulb produce so many tiny glass fragments? When a breakable object falls to the floor or a countertop, glass fragments seem to disperse to every corner of the room. Your initial thought may be to get the vacuum cleaner and clean up the mess as soon as possible. Is it, however, safe to vacuum glass?
The short answer is that it is dependent on the sort of vacuum. Learn which vacuums may be used securely to vacuum glass and other suggested ways for getting rid of every minute piece of glass.
Use a Vacuum with a Flexible Hose Only When Necessary.
Using your vacuum with a flexible hose to suck away glass might damage the machine’s hoses. The jagged edges of glass fragments may damage the vacuum hose even if you pick up the bigger pieces by hand. A minor gap in the hose causes the vacuum to lose suction, rendering it useless at sucking up dust and grime.
Many vacuums include powerheads with beater brushes to aid in the removal of debris imbedded in carpet fibres. The beaters or rollers might disperse the glass shards even further, or the glass can get lodged in the roller.
How to Use a Handheld Vacuum to Clean Glass
Large Pieces Should Be Sweeped Up
Begin by sweeping up the big shards of glass with a broom and dustpan. Put them in a thick paper or plastic bag and throw them away. Before using the portable vacuum, try to remove as much of the glass as possible.
Make use of a Handheld Vacuum.
You can suck away pieces of glass using a handheld vacuum that does not have a flexible hose. Ensure that all filters, as well as the collecting cup or bag, are securely in place. Wearing eye protection, thick gloves, and strong shoes is a smart idea since you will most likely be working near to the floor and the broken glass. Work carefully and deliberately in a grid to catch as much glass as possible in the strongest light available.
Get Rid of the Glass
When you’re done, gently pour the collecting cup into a large paper or plastic garbage bag for disposal. If the vacuum has a disposable collecting bag, put it in a garbage bag and throw it away right away.
How to Use a Wet/Dry Shop Vacuum to Vacuum Glass
Glass can be vacuumed using a wet/dry shop vacuum that can handle water and metal shavings. Follow the manufacturer’s operating instructions and these advice for any brand of shop vacuum:
Into a Pile Sweep the Glass
To begin, while vacuuming glass, use safety eyewear and heavy shoes. Check for any obstructions in the hose or collecting port. Pick up the big pieces of glass with heavy gloves before vacuuming and sweep as much of the glass as possible into a compact pile. Dispose of the glass using a dustpan.
Vacuum the remaining glass on a low setting.
To clear up the remaining shards of glass, start vacuuming on the lowest suction level and gradually increase to the maximum suction level to collect the tiniest fragments. To ensure that you have removed all of the glass, use a strong, LED light held at various angles.