Categories
Home

Preventing Mold After Water Damage With Professional Restoration Services

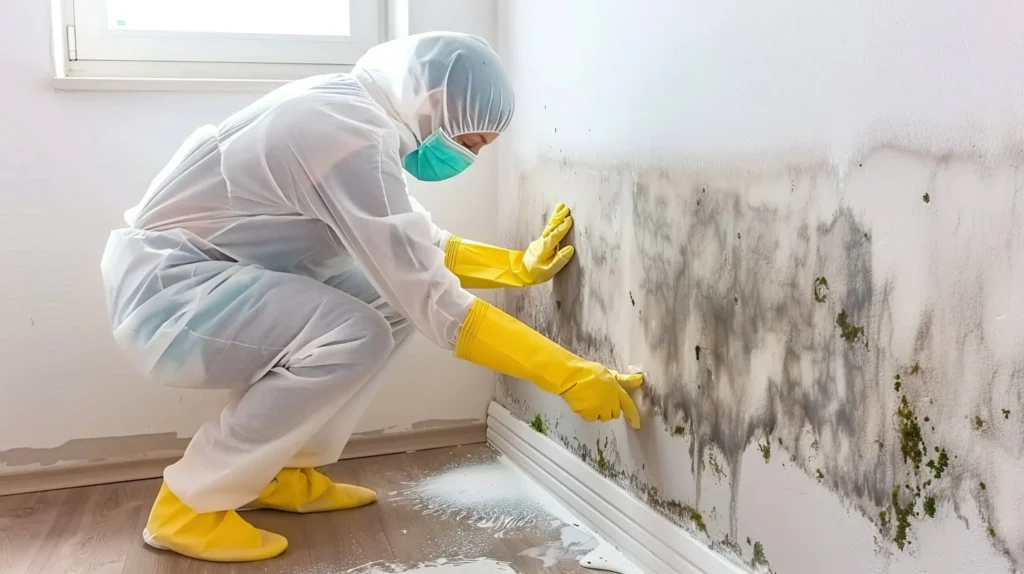
Water damage can affect a property in many ways beyond visible stains and soaked materials. Whether caused by burst pipes, roof leaks, storms, or appliance failures, excess moisture creates the ideal environment for mold to develop. In many cases, mold begins growing within a short period after water exposure, making fast and effective restoration essential. This is why professional water damage restoration companies play such an important role in protecting homes and businesses from long-term moisture-related problems.

Their expertise extends beyond removing standing water. They focus on identifying hidden moisture, drying affected areas thoroughly, and restoring safe indoor conditions before mold has the opportunity to spread.

Why Does Mold Develop After Water Damage?

Mold spores naturally exist in indoor and outdoor environments. Under normal conditions, they remain inactive and harmless. However, when water enters a building and moisture remains trapped in walls, ceilings, flooring, or insulation, these spores begin multiplying rapidly.

Even areas that appear dry on the surface may still contain moisture deep within construction materials. Without proper drying, mold colonies can expand unnoticed, eventually causing unpleasant odors, material deterioration, and indoor air quality concerns.

Rapid Water Removal Limits Moisture Exposure

One of the first priorities for restoration professionals is removing standing water as quickly as possible. Specialized extraction equipment removes large amounts of water far more efficiently than household tools.

The sooner excess water is removed, the less opportunity moisture has to penetrate deeper into structural materials. Fast extraction also reduces the amount of time surfaces remain damp, significantly lowering the risk of mold development. Professional restoration teams understand that every hour matters after water damage occurs.

Advanced Drying Prevents Hidden Moisture

Visible water is only one part of the problem. Moisture often remains trapped behind drywall, beneath flooring, inside insulation, and within wooden framing.

Professional water damage restoration companies use industrial air movers, commercial dehumidifiers, and moisture detection equipment to eliminate water that cannot be seen with the naked eye.

Instead of drying only exposed surfaces, they focus on restoring appropriate moisture levels throughout the entire affected structure. This comprehensive approach helps prevent conditions that encourage mold growth weeks after the initial incident.

Moisture Detection Technology Improves Accuracy

Successful restoration depends on identifying every affected area. Modern restoration professionals rely on advanced tools such as moisture meters, thermal imaging cameras, and humidity monitoring equipment to locate hidden water pockets.

These technologies help technicians detect moisture behind finished walls, under flooring, and inside ceilings without unnecessary demolition. By identifying hidden damp areas early, they can address moisture before mold has a chance to establish itself.

Accurate inspections also ensure that restoration efforts cover the full extent of the damage rather than only the obvious problem areas.

Removing Damaged Materials When Necessary

Some building materials cannot be completely restored after prolonged water exposure. Drywall, insulation, carpeting, ceiling tiles, and other porous materials may retain excessive moisture even after drying attempts. When this occurs, restoration professionals determine whether removal and replacement provide the safest long-term solution.

Removing severely damaged materials eliminates environments where mold could continue developing out of sight while protecting the integrity of the surrounding structure.

Controlling Indoor Humidity

Even after water extraction and drying, humidity levels remain an important factor. Restoration specialists monitor indoor humidity throughout the drying process to ensure moisture levels return to acceptable ranges. Industrial dehumidifiers remove excess water vapor from the air, preventing condensation from forming on building surfaces.

Maintaining balanced humidity creates an environment where mold finds it much more difficult to grow.

Cleaning And Sanitizing Affected Areas

Water damage often introduces contaminants depending on the source of the water. Professional cleaning helps restore healthy indoor conditions after drying is complete.

Restoration teams clean surfaces, remove residue, and apply appropriate antimicrobial treatments where needed. These measures help reduce microbial activity while supporting a cleaner indoor environment during the recovery process. Combined with thorough drying, proper cleaning contributes to a more complete restoration.

Restoring Properties With Long-Term Protection In Mind

Professional restoration involves more than responding to an emergency. Experienced technicians evaluate the property to identify conditions that may contribute to future water problems.

This may include locating plumbing leaks, identifying poor drainage, inspecting roofing issues, or recommending improvements to ventilation. Addressing these underlying concerns reduces the likelihood of recurring moisture problems that can eventually lead to mold.

Preventive recommendations allow property owners to protect their investment long after restoration work has been completed.

Conclusion

Water damage should never be viewed as a temporary inconvenience. Moisture left behind may provide excellent conditions for mold development, affecting both the structure and the interior atmosphere. Professional water damage restoration companies provide the expertise, specialized equipment, and systematic approach needed to remove water, eliminate hidden moisture, control humidity, and restore damaged areas thoroughly.

By responding quickly and addressing moisture at its source, restoration professionals help prevent mold before it becomes a much larger and more expensive problem. Their work not only restores damaged properties but also helps create healthier, safer spaces for homeowners and businesses for years to come.

Categories
Home

Home Features That Add Daily Convenience Without Major Renovations

A comfortable home is not always the result of expensive remodeling projects or complete makeovers. In many cases, the features that make everyday life easier are simple additions that improve functionality, organization, and comfort. Small upgrades often save time, reduce stress, and create a more enjoyable living environment without requiring walls to be removed or rooms to be rebuilt. Homeowners today are increasingly choosing practical improvements that deliver immediate benefits while keeping costs under control. Thoughtful enhancements can transform daily routines without the disruption of a major renovation. Recent home improvement trends also show growing interest in affordable upgrades that prioritize convenience, better storage, smarter lighting, and flexible living spaces over large scale construction. 

Smarter Entryways Create Better First Impressions

The entrance to a home is one of the busiest areas, yet it is often overlooked. Adding a storage bench, wall hooks, or a compact cabinet provides a designated place for shoes, bags, and keys. These simple additions reduce clutter and make it easier to leave the house on time.

Many homeowners also include decorative trays or baskets for organizing daily essentials. Similar to how the Bhumi Jankari Portal keeps important land records organized in one place, a well planned entryway helps every household member know exactly where everyday items belong.

Better Lighting Improves Everyday Living

Lighting has a significant impact on both comfort and productivity. Replacing outdated fixtures with brighter LED lighting or installing motion sensor lights in hallways, closets, or staircases creates a safer and more convenient home.

Layered lighting that combines ceiling fixtures, table lamps, and task lighting allows homeowners to adapt each room to different activities. Good lighting also makes spaces appear larger and more welcoming without changing the room itself. Even simple lighting upgrades can dramatically improve the feel of a home with minimal effort.

Organized Storage Makes Daily Tasks Easier

One of the most practical improvements any homeowner can make is increasing storage efficiency. Drawer organizers, pull out shelves, under bed storage containers, and adjustable closet systems maximize existing space without requiring structural changes.

An organized home reduces the time spent searching for everyday items and keeps living spaces cleaner. Whether storing kitchen supplies, seasonal decorations, or office materials, efficient storage solutions contribute to a smoother daily routine.

The same principle applies when people Visit Punjab State Lottery or access other online platforms where organized information improves user experience. A home benefits from the same level of thoughtful organization.

Smart Technology Adds Everyday Convenience

Modern smart home devices are more affordable than ever. Smart thermostats, video doorbells, programmable plugs, voice assistants, and automated lighting systems simplify daily living while improving energy efficiency.

These devices allow homeowners to control appliances remotely, monitor home security, and automate repetitive tasks. Many upgrades can be installed without rewiring the entire home, making them excellent alternatives to costly renovations.

Technology continues to make homes more adaptable while helping families save both time and energy throughout the day.

Functional Kitchen Accessories Save Time

A kitchen does not always need new cabinets or countertops to become more efficient. Small additions like pull out pantry organizers, magnetic knife holders, drawer dividers, and under cabinet lighting can greatly improve meal preparation.

Replacing cabinet handles or installing soft close hinges also enhances daily use without replacing the cabinetry itself. These affordable improvements create a more pleasant cooking experience while extending the life of existing kitchen features.

Comfortable Workspaces Support Modern Lifestyles

With more people working or studying from home, creating a functional workspace has become increasingly important. A supportive chair, adjustable desk, proper lighting, and cable management accessories improve comfort and productivity without requiring a dedicated office renovation.

Maintaining an organized workspace encourages better concentration and reduces distractions. Much like hp manav sampada helps streamline employee management processes, an organized home office improves efficiency throughout the day.

Small Bathroom Upgrades Make a Big Difference

Bathrooms often benefit from inexpensive improvements such as better shelving, towel hooks, mirror lighting, and space saving organizers. Replacing an old showerhead with a water efficient model can improve comfort while reducing water consumption.

Adding storage above the toilet or installing floating shelves creates additional space without affecting the room’s layout. These small enhancements make daily routines more convenient while keeping the bathroom tidy.

Outdoor Spaces Can Be More Functional

Simple outdoor improvements also increase everyday enjoyment. Weather resistant seating, solar pathway lights, raised garden beds, and organized storage boxes create inviting outdoor areas without major landscaping projects.

Maintaining outdoor spaces becomes easier when practical features are added gradually. Even compact patios or balconies can become relaxing extensions of the home.

Many homeowners also rely on digital resources like kaverionline to simplify administrative tasks, reflecting the broader trend toward practical solutions that save time both inside and outside the home.

Simple Maintenance Prevents Bigger Problems

Convenience is not only about adding new features but also about maintaining existing ones. Regularly checking plumbing fixtures, cleaning air filters, servicing appliances, and sealing windows improves comfort while preventing costly repairs.

Helpful online resources, including https://bandhkamkamgar.org, demonstrate how digital platforms continue making everyday responsibilities more accessible, just as routine home maintenance keeps household systems operating efficiently.

Conclusion

The most valuable home improvements are often the ones that quietly simplify daily life. Better lighting, organized storage, smart technology, efficient kitchens, functional workspaces, and practical maintenance routines all contribute to a more comfortable living environment without requiring expensive renovations. By focusing on thoughtful, affordable upgrades, homeowners can enjoy greater convenience, improved organization, and lasting comfort while preserving both their budget and the character of their home.

Categories
Home

How to Keep Your Home Cool in Summer

Summer heat can make bedrooms uncomfortable, raise energy costs, and place extra strain on cooling equipment. Much of that heat enters through sunny windows, poorly sealed openings, hot roofs, and everyday appliances. Once indoor surfaces become warm, the home may remain uncomfortable long after the outdoor temperature begins to fall.

Keeping a home cool requires more than lowering the thermostat. The most effective approach is to block heat before it enters, improve airflow, reduce indoor heat production, and cool the building during the right hours. Useful seasonal home lifestyle ideas often combine several affordable methods instead of depending entirely on air conditioning.

Block Direct Sunlight Early

Windows can allow a surprising amount of heat into a room. Sunlight warms floors, walls, furniture, and fabrics, which then release heat into the surrounding air.

Close blinds, curtains, or shades before direct sunlight reaches the window. Waiting until the room already feels hot reduces their effectiveness.

Light-colored window coverings generally reflect more sunlight than dark materials. Curtains with a reflective or insulated backing can provide additional protection in heavily exposed rooms.

Exterior shade is even more effective because it stops sunlight before it reaches the glass. Awnings, covered porches, shutters, shade cloth, and carefully positioned plants can reduce solar heat.

Trees and climbing plants require time to grow, but they can become valuable long-term shade sources. Avoid planting large trees too close to foundations, utility lines, roofs, or drainage systems.

Focus first on windows receiving strong afternoon sun. These windows often contribute more heat than those exposed only during cooler morning hours.

Use Natural Ventilation at the Right Time

Opening every window during the hottest part of the day may bring additional heat indoors. Natural ventilation works best when the outdoor air is cooler than the indoor air.

Open windows during the evening, night, or early morning when conditions are comfortable and safe. Create cross-ventilation by opening windows on opposite sides of the home.

Place a fan near one window to push warm air outside. Open another window elsewhere so cooler air can enter. This produces a clearer airflow path than placing several fans randomly around a room.

Close windows once the outdoor temperature rises above the indoor temperature. Shut curtains and blinds at the same time to preserve the cooler air collected overnight.

Security, outdoor air quality, humidity, and insects should always be considered. Use secure screens and avoid leaving accessible windows open while the home is unattended.

Timing is one of the most useful practical cooling strategies because ventilation can either cool the home or make it hotter depending on outdoor conditions.

Make Ceiling and Portable Fans More Effective

Fans cool people by moving air across the skin. They do not significantly lower the temperature of an empty room, so turn them off when nobody is present.

During summer, a ceiling fan should generally push air downward to create a noticeable breeze. Check the manufacturer’s instructions because blade-direction controls vary.

Clean fan blades regularly. A thick layer of dust can reduce efficiency and spread particles into the room.

Portable fans work best when they support a clear purpose. Aim a fan toward people for direct cooling, place it near a cooler hallway to move air into a warm room, or use it near a window during nighttime ventilation.

Avoid placing fans where curtains, paper, or loose objects may be pulled into the blades. Keep cords away from walking paths.

A fan may allow occupants to feel comfortable at a slightly higher thermostat setting. This can reduce cooling demand while maintaining personal comfort.

Reduce Heat Created Indoors

Ovens, stovetops, dryers, lighting, electronics, and hot water all contribute heat. On extremely warm days, changing when these items are used can make rooms noticeably more comfortable.

Prepare meals that require less cooking or use smaller appliances when practical. Outdoor cooking can prevent heat from accumulating in the kitchen, provided it is done safely and permitted in the location.

Run dishwashers, washing machines, and dryers during cooler evening or morning hours. Use full loads so appliances operate less frequently.

Switch off lights and electronics that are not needed. Some devices continue producing heat while sitting idle. Unplug unnecessary equipment or use a switchable power strip where appropriate.

Take shorter, cooler showers and run the bathroom exhaust fan to remove warm, humid air. Humidity can make a room feel hotter even when the temperature has not changed.

Simple summer routines such as these are commonly shared through simple summer living notes because they cost little and reduce the amount of heat the cooling system must remove.

Improve Insulation and Seal Air Leaks

Insulation slows the movement of heat through ceilings, walls, and floors. Homes with poor attic insulation may become especially hot because the roof absorbs strong sunlight for hours.

Inspect accessible attic insulation and look for thin, compressed, wet, or missing areas. Insulation work should be completed safely, and damaged materials may require professional assessment.

Seal visible gaps around exterior doors and windows. Weatherstripping and caulk help prevent cooled air from escaping and hot air from entering.

Check attic access panels, recessed fixtures, plumbing openings, and other penetrations that may allow air movement. Some sealing locations require heat-safe or fire-rated materials.

Close fireplace dampers when the fireplace is not in use, unless the appliance design requires another position. An open chimney can create an unwanted path for air exchange.

Insulation and sealing may not create the instant sensation of a fan, but they support stable indoor temperatures throughout the day.

Maintain Cooling Equipment

An air conditioner cannot work efficiently when airflow is restricted. Inspect the filter regularly and replace or clean it according to the system’s instructions.

Keep supply vents and return grilles free from furniture, rugs, and curtains. Closing many vents may create pressure problems instead of improving comfort.

Outdoor equipment needs clear space for airflow. Remove leaves, weeds, and loose debris from the surrounding area without damaging the unit.

Use a reasonable thermostat setting and avoid repeatedly changing it. Setting the thermostat far below the desired temperature does not normally cool the home faster.

A programmable or smart thermostat can adjust temperatures according to household routines. It may reduce cooling while the home is empty and restore comfort before occupants return.

Unusual noises, weak airflow, leaks, or frequent cycling should be inspected. Early maintenance can prevent a small problem from becoming an expensive breakdown during hot weather.

Keep Bedrooms Cooler at Night

Bedrooms may remain hot because mattresses, walls, and furniture store heat collected during the day. Keep bedroom curtains closed during sunny hours even when the room is unoccupied.

Use breathable sheets and lightweight bedding. Heavy layers can trap body heat and make normal room temperatures feel uncomfortable.

Move the bed away from direct sunlight, hot exterior walls, or equipment that releases heat. Allow space around the bed for air to circulate.

Open the bedroom door when privacy allows so cool air can move between rooms. A fan positioned near the doorway may help bring cooler air inside.

Avoid charging several devices beside the bed. Chargers and electronics release small amounts of heat and can add clutter to the sleeping area.

Create a Layered Summer Cooling Plan

No single method can solve every summer comfort problem. Window shade controls solar heat, ventilation removes stored warmth, fans improve personal comfort, and insulation slows heat transfer.

Start with the rooms that become hottest. Observe when sunlight enters, when outdoor air becomes cooler, and which activities produce the most heat.

The most dependable home comfort inspiration comes from adapting the home to local conditions rather than copying one fixed routine. A humid climate may require more moisture control, while a dry climate may benefit from nighttime ventilation.

Keeping a home cool is easier when heat is prevented rather than chased. Close shades early, ventilate at cooler times, maintain equipment, reduce indoor heat sources, and use fans wisely. Together, these steps create a home that remains more comfortable without placing the entire burden on the air conditioner.

Categories
Home

Best Home Repair Tips for First Time Owners

Buying a first home is exciting, but the repair responsibilities can feel overwhelming. Renters often rely on a landlord when a faucet leaks or a door stops closing. Homeowners must decide whether to fix the problem, contact a professional, or monitor it.

The best approach is not learning every trade at once. First-time owners benefit more from developing inspection habits, understanding basic systems, and knowing when a project is unsafe. Good judgment protects both the home and the repair budget.

Learn Where Important Controls Are Located

Start by locating the main water shutoff valve, electrical panel, gas shutoff, heating controls, and outdoor utility connections. Label them clearly when needed.

During a burst pipe, searching for the water valve wastes valuable time. Practice turning it carefully so you know whether it operates smoothly.

Review the electrical panel labels. Circuits should be identified accurately rather than described with unclear notes. Do not remove the panel cover or touch internal components.

Keep emergency phone numbers and utility account details in an accessible location. Household members should know what to do when they smell gas, see smoke, or discover serious water entry.

Build a Basic Tool Kit Slowly

New homeowners often buy large tool collections containing items they may never use. Begin with practical essentials such as screwdrivers, pliers, an adjustable wrench, a claw hammer, measuring tape, level, utility knife, flashlight, drill, safety glasses, and gloves.

Add specialized tools only when a real project requires them. Researching home products within sensible budgets can help prevent overspending on equipment intended for occasional use.

Quality matters most for tools connected to safety, cutting, drilling, or electrical testing. Cheap tools that slip, crack, or provide inaccurate readings can damage the property or cause injury.

Store tools in one dry, organized area. Returning each item after use prevents wasted time during urgent repairs.

Start With Small, Reversible Repairs

Begin with jobs that are unlikely to create major damage if something goes wrong. Tightening a cabinet handle, lubricating a hinge, replacing weatherstripping, filling a nail hole, or adjusting a loose door latch can build confidence.

Avoid choosing an active plumbing leak or electrical fault as your first project. Watching a repair video does not replace hands-on knowledge of hidden pipes, wiring, structural loads, or local requirements.

Before dismantling anything, take clear photographs. These images help you remember the original position of screws, brackets, wires, and fittings.

Place removed parts in a small container and label them. Losing one unusual screw can delay an otherwise simple repair.

Do Not Ignore Water

Water creates some of the most expensive household damage. Investigate stains, musty smells, dripping sounds, soft flooring, swollen cabinets, and peeling paint promptly.

Inspect under sinks every month during the first year of ownership. Check the water heater, washing machine connections, toilet bases, shower edges, and basement walls.

A small amount of water near a fixture may travel from another location. Dry the area, observe where moisture returns, and avoid assuming the closest pipe is responsible.

Shut off the water before loosening plumbing connections. Keep a bucket, towels, and flashlight nearby.

Wear Suitable Clothing for Repairs

Repair clothing should allow movement and protect the skin. Loose sleeves, scarves, and hanging drawstrings can become caught in tools.

Trousers with practical storage, such as durable women’s utility cargo pants, can hold pencils and small hand tools while leaving both hands free. Avoid overloading pockets with sharp objects.

Remove rings, watches, necklaces, and earrings before using drills, saws, ladders, or moving equipment. Statement accessories such as chunky earrings in gold are better stored safely until the job is complete.

Wear footwear suited to the surface. Comfortable ultra-distance running shoes may be useful for property inspections and outdoor walking, but heavy repairs may require protective work footwear instead.

Create a Repair Priority System

Not every defect needs immediate attention. Divide problems into emergency, urgent, and routine categories.

Emergencies include active flooding, gas smells, electrical burning, structural movement, fire, and loss of heat during dangerous weather. These situations often require shutting down a system and contacting qualified help.

Urgent problems may include small roof leaks, loose railings, failing exterior seals, or plumbing drips. They may not threaten the home immediately, but delaying them can increase damage.

Routine work includes cosmetic paint repairs, squeaky hinges, minor trim damage, and organization improvements.

This system prevents visual imperfections from receiving attention while serious hidden problems remain unresolved.

Read Product Instructions Fully

Many repair mistakes happen because homeowners rely on general assumptions instead of reading the specific instructions. Fillers, sealants, adhesives, paints, and fasteners are designed for particular surfaces and conditions.

Check whether a product is suitable for indoor or outdoor use. Review temperature limits, drying time, ventilation needs, preparation requirements, and cleanup instructions.

Do not mix products unless the manufacturer specifically allows it. Combining cleaners or chemicals can create dangerous reactions.

Keep original labels until the project is complete. Store leftover products safely and record the room or surface where they were used.

Measure Before Purchasing Materials

Measure every opening, wall, fixture, and replacement part more than once. Write the measurements down rather than relying on memory.

Take the old component to the store when practical. Plumbing fittings, screws, filters, bulbs, and hardware can appear similar while having different sizes or specifications.

Purchase a small amount of extra material for flooring, tile, and paint. Future matching may be difficult if the product is discontinued or colors vary between batches.

However, avoid excessive buying. Unused materials consume storage space and may expire before another project begins.

Understand the Limits of Do-It-Yourself Work

A repair is not a good do-it-yourself project simply because the tools are available. Electrical panel work, gas repairs, major roofing, structural alterations, and complicated plumbing often require professional knowledge.

Consider the consequences of failure. A poorly painted wall can be corrected. An incorrectly repaired gas line or structural support can place the household at serious risk.

Insurance policies, warranties, building rules, and local regulations may also affect who can complete particular work.

Hiring a professional is not a failure. It is often the most responsible repair decision.

Keep a Home Maintenance Record

Create a digital or physical file containing inspection reports, manuals, receipts, warranties, paint details, contractor information, and repair dates.

Record the location of hidden pipes or wires discovered during work. Save photographs taken before walls or floors are closed.

Track recurring problems. A drain that blocks every few months or a crack that repeatedly returns may need more than another temporary repair.

Maintenance records also help future contractors understand the property and can provide useful information during a sale.

Set Aside a Repair Fund

Home repairs rarely happen at convenient times. A separate maintenance fund reduces the pressure to delay important work or rely on expensive emergency borrowing.

Contribute regularly, even when the home appears to be in good condition. Roofs, appliances, plumbing fixtures, and heating systems all have limited service lives.

Review likely replacement costs and approximate ages of major systems. Planning does not eliminate surprise repairs, but it makes them easier to manage.

First-time homeowners do not need to become builders, plumbers, and electricians. They need to stay observant, learn from small projects, keep reliable records, and respect the boundary between routine maintenance and professional work.

Categories
Home

How to Prevent Cockroaches in Kitchen Cabinets

Cockroaches are among the most difficult kitchen pests because they hide in narrow spaces, reproduce quickly, and can survive on tiny amounts of food and moisture. Kitchen cabinets provide darkness, warmth, crumbs, grease, and easy access to plumbing, making them an ideal shelter.

Preventing cockroaches requires a complete approach. Cleaning visible surfaces is helpful, but the spaces beneath appliances, around pipes, behind cabinets, and inside storage areas matter even more. Consistent sanitation and early monitoring can stop a small problem from becoming a widespread infestation.

Empty and Inspect Every Cabinet

Begin by removing everything from the affected cabinets. Check food packages, shelf liners, corners, hinges, screw holes, and gaps along the back panels.

Look for live insects, shed skins, egg cases, dark droppings, or a stale musty odor. Cockroach droppings may resemble black pepper or coffee grounds.

Discard contaminated food and damaged packaging in a sealed outdoor garbage bag. Do not move questionable packages into another cupboard because this may spread the infestation.

Inspect cardboard boxes carefully. Corrugated cardboard provides hiding spaces and can carry cockroaches or egg cases into the kitchen.

A broader review of modern household maintenance practices can help homeowners recognize how storage choices affect pest prevention.

Deep-Clean Shelves and Corners

Vacuum cabinet corners, cracks, shelf-support holes, and hinge areas. Use a narrow attachment to reach tight spaces. Empty the vacuum outdoors immediately afterward.

Wash shelves using warm water and a mild cleaning product suitable for the cabinet material. Remove grease, crumbs, syrup, flour, and other residue.

Allow every surface to dry before returning food or dishes. Moisture left beneath shelf liners can create favorable conditions for pests.

Avoid covering active infestations with new shelf paper. Cockroaches may hide beneath loose liners, making inspection more difficult. Smooth, washable surfaces are easier to monitor.

Store Food in Hard Containers

Cockroaches can enter loosely folded bags, cardboard boxes, and thin packaging. Transfer dry goods into hard plastic, metal, or glass containers with secure lids.

Pay special attention to cereal, flour, sugar, pasta, rice, crackers, baking supplies, and pet food. Wipe the outside of sticky jars and bottles before storing them.

Do not keep food in lower cabinets beside plumbing if another storage location is available. Lower areas are more likely to experience leaks and pest activity.

Helpful Toronto kitchen organization ideas can support a cleaner storage system that makes early signs of insects easier to notice.

Remove Grease From Hidden Areas

Cockroaches can survive on grease that homeowners may not notice. Clean the sides and undersides of cabinets near the stove. Wipe backsplash edges, range hoods, appliance handles, and the narrow gaps beside cookers.

Pull out movable appliances and clean beneath them. Grease, food particles, and spilled liquids commonly collect beneath refrigerators, microwaves, and ovens.

Empty toaster crumb trays and clean small appliances before storing them. Avoid leaving food residue inside blenders, air fryers, coffee machines, or sandwich makers.

Use suitable cleaners for each surface and never mix chemical products.

Fix Leaks and Eliminate Moisture

Cockroaches often remain near sinks, dishwashers, refrigerators, and plumbing because they need water. Inspect the cabinet under the sink for dripping pipes, damp wood, and condensation.

Repair leaks promptly rather than placing a container beneath them indefinitely. Dry the sink and surrounding counter before bedtime.

Do not store wet sponges, cloths, or brushes inside closed cabinets. Allow them to dry in a ventilated area.

Check refrigerator drip trays and dishwasher connections. Moisture behind appliances may remain unnoticed for weeks.

Following reliable household moisture prevention advice can reduce conditions that attract cockroaches and damage kitchen materials.

Seal Cabinet Gaps

Cockroaches hide in spaces as narrow as a few millimeters. Examine gaps where cabinets meet walls, countertops, floors, and plumbing lines.

Seal suitable cracks with an appropriate material. Openings around pipes may require mesh combined with sealant. Avoid blocking ventilation or access points needed for plumbing repairs.

Repair peeling laminate, damaged wood, and loose trim that create hidden shelters. Replace badly damaged cabinet panels when cleaning and sealing are no longer practical.

Inspect gaps behind backsplashes and beneath kickboards. These areas often connect several cabinets, allowing insects to travel without being seen.

Manage Garbage and Recycling

Kitchen garbage should be removed regularly, especially when it contains food scraps. Use a bin with a secure lid and clean the inside if liquid leaks from the bag.

Rinse recyclable cans, bottles, and food containers before storing them. Sweet beverage residue can attract cockroaches even when containers appear empty.

Do not keep large amounts of cardboard in the kitchen. Break down delivery boxes and remove them promptly.

Clean the floor beneath garbage and recycling bins. Residue in this area can remain hidden until the containers are moved.

Use Monitoring Traps

Sticky monitoring traps can reveal whether cockroaches are present and where they are traveling. Place traps beneath sinks, beside refrigerators, behind stoves, and along cabinet edges.

Cockroaches usually move close to walls rather than crossing open spaces. Position traps accordingly.

Write the placement date on each trap and check it frequently. The number and type of cockroaches captured can help determine whether the problem is improving.

Keep traps away from children and pets. Replace dusty, wet, or full traps as needed.

Use Baits Instead of Random Spraying

Cockroach bait is often more useful than spraying visible insects. Baits can be placed near hiding areas where cockroaches feed and then return to the nest.

Follow label directions and use only products approved for indoor cockroach control. Place bait in inaccessible areas away from food, dishes, children, and pets.

Do not spray strong repellent insecticides near bait placements. Sprays can drive cockroaches away from the bait or scatter them into other parts of the home.

Avoid using excessive amounts. Several small placements near active areas may be more effective than one large application.

Seasonal Calgary home maintenance information can also help households coordinate pest checks with other kitchen cleaning tasks.

Inspect Groceries and Deliveries

Cockroaches may enter homes in grocery bags, used appliances, delivery boxes, or secondhand furniture. Inspect items before bringing them into the kitchen.

Remove produce from cardboard cartons when practical. Check bulk food packages for damage or contamination.

Used microwaves, coffee machines, refrigerators, and other warm appliances should be inspected carefully. Cockroaches can hide inside motors, vents, and electronic compartments.

Avoid storing delivery boxes indoors. Even clean-looking cardboard can provide shelter for insects.

Reduce Nighttime Food Access

Cockroaches are most active at night. Before going to bed, wash dishes, wipe counters, sweep the floor, and put food away.

Do not leave pet food out overnight. Clean feeding bowls and store the remaining food in a sealed container.

Dry the sink and remove food from drain strainers. Close garbage lids and wipe any spills around bins.

A nightly five-minute routine can remove the easiest food and water sources before cockroaches begin searching.

Seek Professional Treatment When Needed

Professional pest control is recommended when cockroaches are seen during daylight, appear in several rooms, continue after baiting, or include multiple sizes. Daytime activity may indicate that hiding areas are overcrowded.

Apartment residents should inform property management because cockroaches can travel between units through walls, plumbing, and shared utility spaces.

A pest professional can identify the species, locate activity zones, and create a targeted treatment plan. Continue cleaning and sealing during and after treatment.

Preventing cockroaches in kitchen cabinets depends on discipline. Keep cabinets clean and dry, store food securely, remove cardboard, repair leaks, seal gaps, and monitor hidden areas. These steps make the kitchen less attractive and allow new activity to be discovered before the infestation spreads.

Categories
Home

How to Stop a Leaking Faucet Quickly

A leaking faucet creates an irritating sound, stains sinks, wastes water, and can increase household utility costs. Fortunately, many faucet leaks come from small internal components that can be replaced without changing the entire fixture.

The correct repair depends on the faucet type and the exact location of the leak. Water dripping from the spout usually indicates an internal valve problem. Water leaking around the handle may come from an O-ring, packing nut, or cartridge seal. Moisture underneath the sink may be caused by supply lines, fittings, or the faucet body.

Before taking anything apart, identify the source and prepare the work area.

Confirm Where the Water Is Coming From

Dry the faucet, sink, countertop, cabinet, and supply connections. Turn the faucet on and watch each area carefully.

A drip from the spout after the handle is closed normally points to a worn washer, cartridge, ceramic disc, valve seat, or internal seal.

Water around the base may come from a damaged gasket or loose mounting hardware. Leakage near the handle can indicate worn O-rings or a loose packing nut.

Check underneath the sink while the faucet is running. Tight spaces can hide water traveling along supply tubes before it drops onto the cabinet floor.

Place dry paper towels around connections. Even a small leak will leave a visible wet mark and help identify the source.

Turn Off the Water Supply

Look beneath the sink for hot- and cold-water shutoff valves. Turn both valves clockwise until closed. Do not force a valve that is severely corroded or stuck.

Open the faucet to release remaining pressure and confirm that the water has stopped. If shutoff valves do not work, close the home’s main water supply before continuing.

Cover the drain with a stopper or cloth. Faucet screws, clips, springs, and washers are small enough to disappear into the drain.

Place the removed components in order on a towel. Taking a photo after each step can make reassembly easier.

Identify the Faucet Type

Most household faucets fall into four general categories: compression, cartridge, ball, and ceramic-disc.

Compression faucets usually have separate hot and cold handles. They control water by pressing a rubber washer against a valve seat.

Cartridge faucets may have one or two handles. A removable cartridge regulates flow and temperature.

Ball faucets usually have one handle attached to a rounded cap. They contain several small seals, springs, and a rotating ball.

Ceramic-disc faucets often have one lever and use durable ceramic plates inside a cylinder.

Knowing the type prevents you from purchasing incorrect replacement parts.

Repair a Compression Faucet

Remove the decorative cap from the leaking handle and unscrew the handle. Use the correct tool to remove the packing nut without damaging its surface.

Lift out the stem assembly. A rubber washer is usually attached to the bottom with a small screw. Replace the washer with one of the same shape and size.

Inspect the O-ring around the stem. Replace it if it is flattened, cracked, or loose. Apply only a small amount of plumber-approved grease when recommended for the component.

Check the valve seat inside the faucet body. A damaged or heavily corroded seat may continue cutting into new washers. Some seats can be removed with a seat wrench, while others require professional repair.

Reassemble the faucet and tighten components firmly without excessive force.

Replace a Faucet Cartridge

Remove the handle screw and lift off the handle. Depending on the model, you may need to remove a retaining nut, decorative sleeve, or metal clip.

Note the cartridge’s orientation before pulling it out. Installing the replacement backward can reverse hot and cold controls or prevent proper operation.

Mineral buildup may make the cartridge difficult to remove. A manufacturer-compatible cartridge puller can help. Avoid twisting the faucet body or nearby pipes.

Take the old cartridge to a plumbing supplier or hardware store for accurate matching. Similar-looking cartridges are not always interchangeable.

Clean the interior of loose debris, install the new cartridge in the correct position, and replace the retaining parts.

Repair a Ball Faucet

Ball faucets contain multiple small pieces, making them more complex than compression faucets.

Remove the handle and cap. Lift out the ball and inspect it for wear or mineral buildup. Below the ball, small rubber seats and springs control the water supply.

A repair kit designed for the exact faucet model is usually the easiest option. Replace the seats, springs, O-rings, and other worn components included in the kit.

Do not scratch the inside of the faucet body. Damage to the sealing surface can cause continued leakage.

Reassemble the parts in the correct order. Tightening the cap too much may make the handle difficult to operate.

Service a Ceramic-Disc Faucet

Remove the handle and decorative cap to access the ceramic cylinder. Unscrew the retaining hardware and lift the cylinder from the faucet.

Inspect the seals at the bottom. Mineral deposits or damaged seals can prevent the ceramic plates from closing completely.

Clean accessible openings with white vinegar and a soft brush. Replace damaged seals or the entire cylinder when necessary.

Ceramic components are durable but can crack if handled roughly. Reinstall the cylinder in the same position and tighten screws evenly.

Open the water supply slowly after completing the repair. A sudden burst of water can place unnecessary stress on internal components.

Fix Leaks Around the Faucet Base

Water around the base may not be coming from the valve. It may be caused by splashing, a loose faucet, failed gasket, damaged sealant, or water traveling from the handle.

Inspect mounting nuts underneath the sink. Tighten loose hardware carefully while another person holds the faucet in alignment.

If the base gasket has failed, remove the faucet and replace the gasket according to the manufacturer’s instructions. Clean old residue before reinstalling the fixture.

Some faucet bases use plumber’s putty or approved sealant, while others rely on a rubber gasket. Follow the fixture instructions instead of adding sealant automatically.

Inspect Supply-Line Connections

Leaks below the sink often develop where supply lines attach to shutoff valves or faucet tails.

Tighten compression nuts slightly with two wrenches, using one to hold the valve steady. This prevents torque from damaging the pipe inside the wall.

Replace supply lines that show corrosion, cracks, bulging, fraying, or damaged fittings. Do not reuse a line that has been sharply bent or stressed.

Thread-sealing tape is not appropriate for every type of connection. Compression fittings and connections with rubber washers usually seal through their own components.

If a shutoff valve leaks around its stem, gentle tightening of the packing nut may help. Replace the valve when leakage continues.

Turn the Water Back On Slowly

Close the faucet handles before reopening the shutoff valves. Open each valve gradually and watch all repaired areas.

Run both hot and cold water. Check the spout, handle, base, supply lines, and cabinet floor. Dry everything and inspect again after several minutes.

Remove the aerator and flush the faucet briefly when debris may have entered during the repair. Reinstall the aerator after the water runs clear.

A few drops left inside the spout may fall after shutoff. Continuous dripping indicates that the repair has not fully corrected the sealing problem.

Deciding Whether to Repair or Replace

Repair is usually worthwhile when the faucet body is in good condition and replacement parts are available. Replacement may be more practical when the fixture is badly corroded, repeatedly leaks, has cracked components, or uses discontinued parts.

Home-service contractors often build customer awareness through local plumbing publicity and neighborhood-focused marketing. Some companies use plumbing company ranking services to appear when homeowners search for urgent repairs.

Contractors may follow small plumbing business guidance to improve estimates and customer service. They may also consider backlink packages for service businesses when promoting their websites. These marketing efforts can help customers discover companies, but homeowners should still verify technical qualifications.

Prevent Future Faucet Leaks

Do not force faucet handles after the water stops. Excessive pressure damages washers, cartridges, and valve seats.

Clean aerators regularly to reduce pressure buildup caused by mineral debris. Address hard-water scale before it damages multiple fixtures.

Check beneath sinks periodically and replace aging supply lines. A small leak caught early is easier to repair than swollen cabinets or damaged flooring.

Most leaking faucets can be stopped quickly after the correct internal part is identified. Shut off the water, preserve the order of components, install an exact replacement, and test every connection. When the faucet body is damaged or the leak continues after repair, replacement or professional service is the more dependable choice.

Categories
Home

How to Reduce Electricity Usage Without Sacrificing Comfort

Reducing electricity use does not require sitting in a dark room, sweating through summer, or turning your home into an uncomfortable experiment. Most families can cut waste while keeping the lighting, temperature, entertainment, and appliances they value.

The key is to separate comfort from constant energy consumption. A comfortable home responds to people when they are present. A wasteful home heats, cools, lights, and powers spaces whether anyone needs them or not.

Define What Comfort Means in Your Home

Comfort is personal. One household may care most about cool bedrooms, while another wants a warm living room in the evening. Identify the rooms, times, and activities that matter most before making changes.

This approach prevents random cutbacks. Switching off a lamp used for reading may cause frustration, while turning off decorative lights in an empty room may go unnoticed. Strong household money management advice often begins with protecting priorities and cutting expenses that provide little value.

Ask each family member which energy uses affect daily comfort. Then look for equipment that runs outside those periods. You may discover a bathroom fan operating for hours, a second refrigerator holding only a few items, or an office computer left active overnight.

Control Temperature by Zones

You do not need every room to feel identical. Close curtains against strong summer sun and open them during cooler parts of the day. In winter, let sunlight warm occupied rooms, then close coverings after sunset.

Use ceiling or portable fans when people are present. Air movement can make a room feel cooler without forcing the air conditioner to reach an aggressive setting. Remember to turn fans off when everyone leaves.

Close doors to spaces that do not need the same level of comfort, but consider how your heating and cooling system handles airflow. Blocking too many vents or closing rooms served by a central system may create pressure problems. Use zoning carefully rather than guessing.

At night, focus cooling or heating on bedrooms instead of conditioning unused daytime spaces. A suitable blanket, breathable bedding, or well-placed fan may provide comfort with less system run time.

Keep Heating and Cooling Equipment Healthy

A clogged filter restricts airflow and can make rooms feel uncomfortable even while the system consumes more energy. Clean or replace filters on schedule and keep return vents free from furniture, rugs, and stored items.

Check outdoor equipment for leaves, dirt, or objects that block airflow. Do not perform electrical or mechanical work unless qualified, but keep the surrounding area clear according to the manufacturer’s recommendations.

Unusual sounds, uneven temperatures, weak airflow, or rapidly changing cycles may signal a problem. Reliable home repair and service resources can help you prepare questions before arranging professional inspection.

Maintenance protects comfort because an efficient system reaches the desired temperature more evenly. Waiting until equipment fails often means higher bills, uncomfortable rooms, and rushed repair decisions.

Use Lighting Where It Adds Value

A bright home does not require every ceiling fixture to operate at once. Combine natural light with task lamps near work areas, reading chairs, kitchen counters, and mirrors.

Replace heavily used bulbs with LEDs that match your preferred brightness and tone. Warm light may suit bedrooms and living rooms, while clearer light often works better in kitchens or workspaces.

Install dimmers where lower light levels improve the atmosphere. Motion sensors can help in garages, closets, storage rooms, and outdoor areas where lights are commonly forgotten.

Arrange furniture to make daylight useful. A desk placed near a window may need no lamp for much of the day. A mirror positioned carefully can spread light deeper into a room without consuming electricity.

Make Entertainment and Office Devices Responsive

Modern homes contain televisions, speakers, routers, monitors, printers, consoles, and charging equipment. Many remain powered long after people stop using them.

Enable sleep settings on computers and televisions. A screen should not stay fully active during long periods of inactivity. Lower screen brightness to a comfortable level rather than keeping it at the highest setting.

Connect related devices to a power strip that can be switched off easily. Keep equipment that must remain active, such as certain routers or security systems, on a separate outlet.

Charge phones, tablets, and laptops when needed, then disconnect unused chargers. The saving from one charger is modest, but a home full of idle equipment creates constant background use.

Articles covering smarter spending and technology choices can also help households judge whether a new gadget solves a real problem or adds another device that consumes power around the clock.

Cook Efficiently Without Changing Your Meals

Match the cooking appliance to the portion. Use a microwave, toaster oven, pressure cooker, slow cooker, or air fryer when it can prepare the meal without heating a full-size oven.

Keep lids on pots so food reaches the desired temperature faster. Match pan size to the burner and turn electric burners down once boiling begins.

Cook several items during one oven session when practical. Opening the oven door repeatedly releases heat and extends cooking time. Use the oven light and window to check food instead.

During warm weather, choose meals that require less indoor heat or cook at cooler times of day. This does not mean giving up favorite dishes. It means avoiding a hot kitchen that forces the air conditioner to work harder.

Improve Laundry and Dishwashing Habits

Wait for full loads, but do not pack machines beyond their recommended capacity. Overloading can reduce cleaning performance and lead to repeat cycles.

Wash most clothing in cold water and choose shorter cycles for lightly soiled items. Air-dry delicate or lightweight garments when space and weather allow.

Clean the dryer lint screen after each load. Use moisture-sensing settings when available so the machine stops when clothes are dry instead of continuing for a fixed period.

Run the dishwasher when full and use economy settings if they clean effectively. Let dishes air-dry rather than using extra heat. These changes preserve convenience while reducing unnecessary electricity.

Adapt the Plan to Local Conditions

A strategy that works in a dry, mild climate may not suit a humid or extremely cold area. Comfort depends on temperature, moisture, building materials, and local weather patterns.

Consider local housing and community insights when planning larger improvements. Shade trees, window treatments, insulation levels, and cooling equipment should match the conditions around your home.

Reducing electricity usage without sacrificing comfort is a matter of precision. Keep energy focused on occupied rooms, maintain important equipment, improve lighting, and stop devices from running without purpose. You can protect the parts of home life you enjoy while quietly removing the waste you never needed.

Categories
Home

How to Fix Damp Interior Walls Permanently

Damp interior walls can develop peeling paint, bubbling plaster, dark stains, powdery deposits, musty odors, and mold. These symptoms may look similar, but they do not always share the same cause. A permanent repair begins with an accurate diagnosis. Painting over the wall or applying a waterproof coating without finding the moisture source usually delays the problem rather than solving it.

Water may enter from a leaking roof, damaged pipe, exterior wall, window opening, or foundation. Condensation can also form when humid indoor air reaches a cold surface. Each cause requires a different repair, so homeowners should investigate carefully before removing finishes or buying products.

Identify the Dampness Pattern

The position and shape of the damp area provide useful clues. A stain that grows after rainfall may indicate an exterior leak. Dampness near a bathroom or kitchen could come from plumbing. Moisture concentrated in cold corners may be condensation.

Marks beginning near the floor can be related to ground moisture, foundation seepage, or a hidden pipe. A horizontal stain beneath a window may point to failed seals, damaged flashing, or blocked drainage openings.

Inspect both sides of the wall where possible. Check the room above, the exterior surface, nearby plumbing fixtures, roof edges, gutters, and downspouts. Do not assume the visible stain sits directly beside the leak because water can travel through framing.

Homeowners consulting home repair planning resources should photograph the area over several days. Comparing images after rain, showering, cooking, or appliance use can reveal when the moisture becomes worse.

Stop Exterior Water Entry

Exterior water must be stopped before the interior wall is repaired. Examine cracked render, damaged siding, loose masonry joints, failed sealant, and gaps around windows or doors.

Clear gutters and confirm that downspouts direct rainwater away from the foundation. Overflowing gutters can repeatedly soak upper walls, while short downspouts can saturate soil beside basement or ground-floor rooms.

Roof flashing around chimneys, vents, valleys, and wall connections should be checked when dampness appears near ceilings or upper floors. Roof work can be dangerous, so use a qualified contractor rather than climbing without proper equipment.

Property owners monitoring housing investment and market information should view water intrusion repairs as protection for the building, not merely decoration. Persistent dampness can weaken finishes, damage timber, and make a home harder to maintain or sell.

Repair Plumbing and Appliance Leaks

A pipe can leak inside a wall without producing visible dripping. Warning signs include unexplained water-meter movement, warm or cold patches, soft drywall, sounds of running water, or damage near bathrooms and kitchens.

Check supply hoses, drain connections, shower seals, toilet fittings, water heaters, refrigerators, dishwashers, and washing machines. A failed shower enclosure may allow water to enter the wall every day even when the plumbing itself is intact.

Turn off the water supply when an active leak threatens further damage. A plumber may need to open part of the wall to find and replace the damaged fitting.

Do not close the wall immediately after the pipe is repaired. Enclosed wood, insulation, and drywall must be dry enough to avoid trapping moisture. Replace materials that have lost strength or cannot be cleaned adequately.

Distinguish Condensation From Penetrating Damp

Condensation usually appears on colder walls, windows, corners, or areas behind furniture. It may become worse during winter or after showering and cooking. Penetrating damp often produces a more localized patch connected to a building defect.

Reduce condensation by improving ventilation, controlling indoor humidity, and increasing airflow. Move furniture away from cold exterior walls. Use bathroom fans, kitchen extraction, dehumidification, and steady heating.

Insulation may help raise the wall’s surface temperature, but it must be installed correctly. Poorly planned insulation can move condensation into hidden parts of the structure. Seek professional building advice for major upgrades.

Never assume that a “damp-proof” paint can correct condensation. It may resist staining for a while, but moisture will continue collecting unless humidity and surface temperature are addressed.

Dry the Wall Thoroughly

Once the source has been corrected, the wall needs time to dry. Surface dryness does not always mean the inner material is ready for finishing.

Increase ventilation and operate a dehumidifier where appropriate. Keep air moving across the wall without directing powerful heat at one small area. Excessive heat can crack plaster or dry the surface while deeper layers remain wet.

Remove loose paint and damaged wallpaper to help trapped moisture escape. Badly softened drywall normally requires replacement. Plaster and masonry may sometimes be retained if they remain stable and can dry fully.

Professional building service guidance can be valuable when moisture readings remain high. A contractor or surveyor can use meters and inspection tools to determine whether hidden areas are still damp.

Remove Mold and Damaged Finishes

Mold should be handled carefully. Wear gloves and avoid sanding or dry brushing contaminated surfaces because this can release particles into the air.

Small amounts on washable, nonporous areas may be cleaned with an appropriate detergent solution and then dried completely. Porous materials with extensive growth may need to be removed and discarded according to local requirements.

Avoid mixing cleaning chemicals. Never combine bleach with ammonia, acids, or other cleaners. Strong products do not replace moisture correction, and some can damage finishes or create dangerous fumes.

Large infestations, repeated growth, contaminated ventilation systems, sewage exposure, or damage affecting vulnerable occupants should be evaluated by a qualified remediation professional.

Restore the Wall With Suitable Materials

Do not rush to repaint. The wall should be clean, stable, and adequately dry. Remove flaking coatings, repair cracks, replace damaged sections, and prepare the surface according to the chosen finish.

Use primers designed for the actual surface and type of staining. Mold-resistant paint may provide extra protection in bathrooms or laundry rooms, but it is not a substitute for ventilation.

Where salts have moved through masonry, specialized preparation may be needed. Painting directly over powdery deposits can lead to poor adhesion and renewed bubbling. Severe foundation or masonry dampness may require a building specialist.

Modern home renovation trends often promote decorative moisture-resistant finishes, yet the hidden repair remains the most important step. A beautiful coating applied to a wet wall will eventually fail.

Prevent the Dampness From Returning

Inspect the repaired area during heavy rain, cold weather, and periods of high indoor humidity. Continue using ventilation and maintain any dehumidifier or drainage improvements.

Clean gutters, check seals, service plumbing, and keep soil or landscaping from holding water against exterior walls. Leave airflow space behind furniture and avoid storing damp materials against the repaired surface.

A permanent solution is possible only when the source has been correctly identified and stopped. Drying, mold removal, plaster repair, and repainting come afterward. Treat the cause first, allow the structure to recover, and then restore the finish. That order protects the wall far longer than any quick cosmetic treatment.

Categories
Home

Best Storage Solutions for Cluttered Living Rooms

The living room often becomes the busiest space in the home. It may serve as a place for relaxing, watching television, entertaining guests, working, playing, reading, and storing items that belong in other rooms. Without a clear system, clutter can build quickly on coffee tables, sofas, shelves, and floors.

Effective living room storage should control everyday mess without making the room resemble a warehouse. The right solutions combine hidden compartments, accessible baskets, attractive shelving, and furniture that matches the scale of the room.

Homeowners researching functional home improvement solutions should first observe how clutter enters the living room. Shoes, toys, mail, blankets, chargers, books, and remote controls require different storage methods.

Choose a Coffee Table With Storage

A coffee table occupies valuable floor space, so it should provide more than a surface for drinks. Models with drawers can hold chargers, remote controls, coasters, notebooks, and small electronics.

Lift-top coffee tables provide a larger hidden compartment and can also create a temporary work or dining surface. They are especially useful in apartments where there is no room for a separate desk.

Open lower shelves are suitable for books, magazines, and decorative baskets. Use matching containers to prevent the shelf from looking untidy. Each basket can be assigned a category, such as children’s toys, electronics, reading materials, or craft supplies.

Avoid selecting an oversized table for a small living room. Leave enough space for comfortable movement between the sofa, table, and television area.

Add Closed Storage Along One Wall

Open shelves are attractive when carefully styled, but they can make a cluttered room appear busier. Closed cabinets hide mixed objects and create a calmer visual effect.

A low media console with drawers or cupboards can store television equipment, gaming accessories, cables, DVDs, and board games. Choose a design that allows airflow around electronics and includes openings for wires.

Tall cabinets use vertical space efficiently. They can store books, office supplies, toys, table linens, or occasional household items. A combination of open and closed sections creates space for decoration while concealing practical belongings.

Readers searching for organized living room inspiration can consider built-in cabinets if the room has awkward recesses. A fitted unit can use the full width and height of the wall while creating a more integrated appearance.

Paint built-in storage the same color as the wall to make it feel less dominant. Alternatively, use a contrasting finish to turn it into a strong design feature.

Use Baskets for Fast Daily Cleanup

Baskets are helpful because they allow clutter to be collected quickly. A large basket beside the sofa can hold blankets and cushions. Smaller baskets can organize toys, magazines, knitting supplies, or pet accessories.

Choose baskets that suit the room’s style. Woven materials add warmth, fabric bins provide a softer appearance, and structured boxes create a cleaner modern look.

Each basket should have one purpose. When unrelated items are placed together, finding anything becomes difficult and the basket eventually turns into hidden clutter.

A handled basket can work as a portable collection container. During an evening reset, gather objects that belong in other rooms and carry them back in one trip.

Do not place baskets in every empty corner. Too many containers can take up floor space and make the room feel smaller. Select a limited number that solve specific storage problems.

Control Cables and Small Electronics

Chargers, extension cords, headphones, controllers, and streaming devices can create visual clutter even when the rest of the room is organized. Cable management should be included in the storage plan.

Use cable clips to guide wires along the back of furniture. A cable box can conceal a power strip and excess cord length. Label similar chargers so family members can identify them quickly.

Create one drawer or basket for small electronics. Use dividers to separate charging cables, batteries, adapters, remote controls, and instruction booklets.

Practical home organization recommendations should also include a charging station. Keeping devices in one place reduces the number of cables left across sofas and side tables.

Remove outdated or unidentified cables. Test them before discarding, but avoid storing every wire from previously owned electronics.

Turn Empty Corners Into Useful Storage

Living room corners are often left empty because standard cabinets do not fit comfortably. Corner shelves can provide space for books, plants, photographs, or decorative boxes.

A narrow cabinet may fit between a sofa and the wall. This area can store blankets, games, or seasonal decorations while also supporting a lamp.

Floating corner shelves keep the floor clear and create a lighter appearance. They work best for smaller objects and should not be overloaded.

In a family living room, an unused corner can become a controlled toy area. Add a low storage unit that children can access independently. Clear labels or picture labels make cleanup easier.

When storage is designed around the room’s awkward areas, the main walkways remain open and the central space feels less crowded.

Use Storage Behind and Beneath the Sofa

The space beneath a raised sofa may hold slim storage containers. Use this area for items that are not required daily, such as seasonal textiles, spare cushion covers, or occasional games.

A narrow console table behind the sofa can provide drawers, shelves, and a surface for lighting. It is especially useful when the sofa stands away from the wall.

Place baskets beneath the console for larger objects. The table can also create a visual separation between the living area and dining area in an open-plan home.

Sofa arm organizers provide pockets for remote controls, reading glasses, notebooks, or tablets. Choose a simple design that blends with the upholstery.

Storage additions should not interfere with comfort. Avoid placing hard containers where they make sitting or movement difficult.

Create a System for Children’s Toys

Toy storage should be easy for children to understand. Deep boxes may hide clutter, but they can also make it difficult to find specific toys.

Use several smaller containers for categories such as building blocks, vehicles, dolls, puzzles, and art supplies. Picture labels help younger children return items correctly.

Rotate toys instead of keeping everything available. Store part of the collection in another area and exchange it every few weeks. This reduces clutter and can renew children’s interest in familiar items.

A storage bench can provide toy space and additional seating. Check that the lid has safety hinges and cannot close suddenly.

Families exploring household and property ideas can maintain the living room more easily when every family member understands where commonly used items belong.

The best storage solutions do not remove personality from the living room. They create enough structure for books, blankets, toys, technology, and everyday belongings to coexist without taking over the space. Start with the category creating the most visible clutter and build the system gradually.

Categories
Home

Signs Your Water Heater Needs Professional Attention Before It Fails

One of the most important things in any home is a water heater that you can count on. It gives you hot water for showers, dishes, cleaning, and many other everyday tasks. Homeowners often forget about it until it stops working totally because it works in the background quietly. Waiting until the whole thing breaks down can be inconvenient, cost a lot to fix, and even cause water damage.

When you know how to spot early warning signs, you can take care of small problems before they get worse. Regular maintenance and inspections by a professional can greatly extend the life of your system and keep it running smoothly.

Inconsistent Hot Water Supply

One of the first indicators that something is wrong is inconsistent water temperature. The heating elements or thermostat may not be working right if your shower gets cold all of a sudden or if the hot water runs out much faster than normal.

Although occasional temperature fluctuations can happen, repeated problems often indicate wear inside the system. Addressing these issues early prevents further damage and helps restore reliable performance.

Strange Sounds Coming From the Tank

Water heaters naturally make small operating noises, but loud popping, rumbling, or banging sounds should never be ignored.

These noises are commonly caused by sediment accumulating at the bottom of the tank. As the burner heats the trapped sediment, it creates unusual sounds and reduces heating efficiency. Over time, excessive buildup forces the unit to work harder, increasing energy consumption and accelerating internal wear.

A professional technician can determine whether flushing the tank is enough or whether additional repairs are necessary.

Rust Colored Water

If hot water begins appearing brown, reddish, or rusty, your water heater may be experiencing internal corrosion.

Rust inside the tank can weaken the metal and eventually cause leaks. While discolored water may also originate from aging household pipes, a professional inspection can identify the actual source before permanent damage occurs.

Replacing worn protective components early may extend the life of the appliance and help avoid complete system failure.

Water Around the Base of the Unit

Even a small puddle near your water heater deserves immediate attention.

Leaks may develop from loose fittings, pressure relief valves, or cracks inside the storage tank. Ignoring moisture around the unit allows damage to spread to nearby flooring, drywall, and surrounding structures.

Scheduling Water heater repair Houston services as soon as a leak appears can prevent larger repair costs while protecting your home from unnecessary water damage.

Rising Utility Bills

An aging or malfunctioning water heater often becomes less energy efficient.

When heating elements struggle, or sediment reduces performance, the system consumes more energy to produce the same amount of hot water. If your monthly utility bills continue rising without another obvious explanation, your water heater may be operating inefficiently.

Professional maintenance can restore efficiency and reduce unnecessary operating expenses.

Frequent Repairs Become More Common

Occasional maintenance is normal for most appliances, but repeated repairs within a short period usually indicate a larger problem.

If you find yourself constantly replacing components or calling technicians for recurring issues, the entire system should be professionally evaluated. An expert can determine whether repairs remain cost-effective or if replacement would provide better long-term value.

Making the right decision at the proper time often saves homeowners significant money over the years.

Reduced Water Pressure

Mineral deposits can gradually build inside the tank and connected plumbing lines.

As buildup increases, water flow becomes restricted, leading to noticeably lower hot water pressure throughout the home. Reduced pressure affects showers, faucets, and appliances while placing additional strain on the plumbing system.

Regular checks help find these problems before they get in the way of daily life.

Know When Professional Help Matters

Many homeowners postpone service because the water heater still works most of the time. However, small warning signs rarely resolve themselves. Instead, they usually become more serious and more expensive if ignored.

Experienced plumbing professionals have the equipment and expertise to identify hidden issues that homeowners cannot easily detect. Regular inspections, preventive maintenance, and timely repairs improve safety, efficiency, and system reliability.

Conclusion

Your water heater provides essential comfort every day, making early maintenance far more valuable than emergency repairs after a complete failure. Warning signs such as inconsistent hot water, unusual noises, rusty water, leaks, higher energy bills, repeated repairs, and reduced water pressure all indicate that professional attention may be needed.

If you act on these signs as soon as they show up, you can avoid sudden breaks, make your equipment last longer, and make sure your family has reliable hot water for years to come.